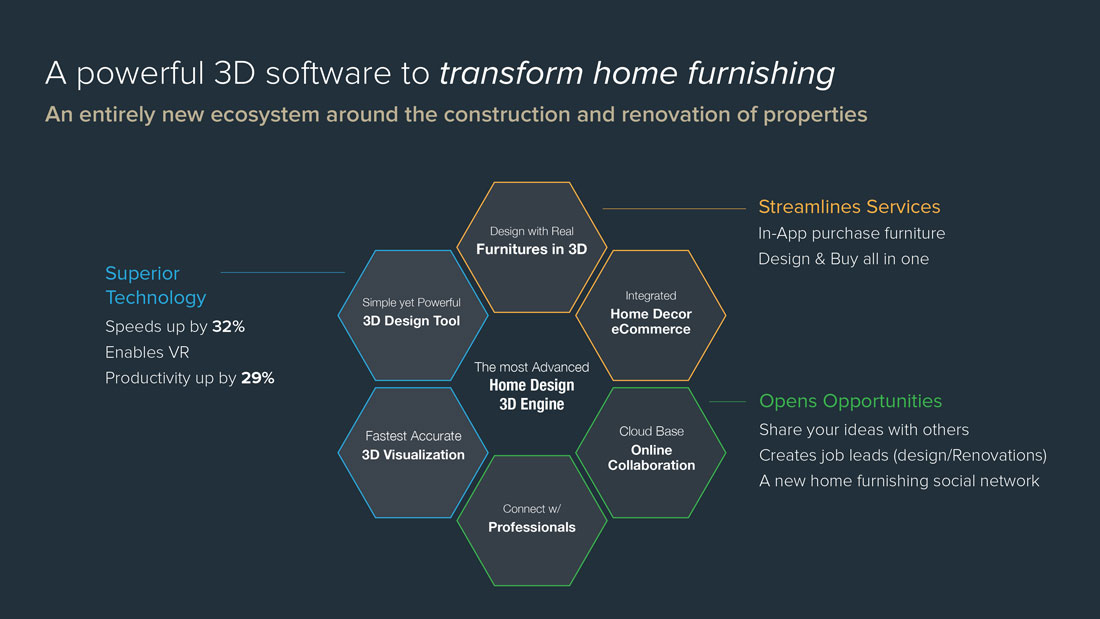
Cocoon 3D
Cocoon 3D is a BIM (Building Information Modeling) software for architects, interior designers, and furnishing companies to design, collaborate. and visualize quickly.
Introduction
This is a CAD + 3D modelling application for architects, interior designers, and furnishing companies. The goal of the product is to create a software that allows architects and interior designers to design without constraining their creativity due to the complexity and the high learning curve of 3D applications.
Product Design with Cocoon 3D
As the only UX designer on the team, my responsibilities include researching and designing for the entire application from concept to production
My work on this project was focusing on all aspect of design from strategy to production work. I worked closely with stakeholders and the development team to create the next generation 3D modelling application for architects and interior designers
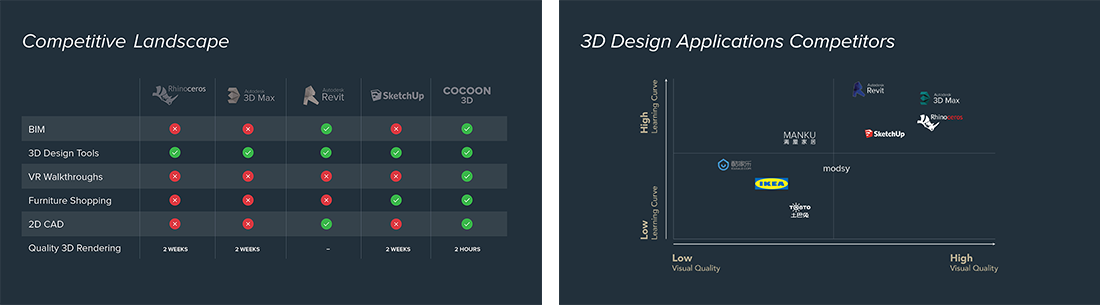
Here are some of the biggest challenges for users when using a 3D modelling application:
- High learning curve with poor on-boarding experience
- Hidden interactions and excessive information on screen
- Primarily used as a visualization tool instead of a design tool (due to the complexity of interactions)
Some of the initial challenges we faced when designing Cocoon 3D
- There are numerous ways to achieve a single task such as creating a room
- Identifying all the features we need
- Coming up with 3D building tools and ideas in a 2D environment such as photoshop, illustrator, or sketch
Project Kick off - Discovery
Since there are always multiple ways to 3D model an object and the user flow for a 3D modelling software can easily be overwhelming, it was crucial for the team and I to clearly identify new features and user goals before creating and developing the new software.
Below were some of the discovery exercises to gather initial qualitative data:
- User interviews
- Focus groups
- Workshops
- Observing how users interact with existing 3D modelling and CAD softwares
- Heuristic Evaluations
Through workshops and user interviews, we had collaborated with our stakeholders and mapped out the entire workflow of architects and interior designers and the relationship between them. This was a was very important step for us because it allowed the team to visually understand our stakeholders’ pain-points and identify all the requirements for our initial launch.
User Flows - Experiments and Validations
After the discovery phase we had a very good understanding of their workflow,
design process, and the challenges they were facing with existing 3D applications.
However, the next major obstacle we faced when designing and developing the application
was to come up with features and interactions.
Since there are always possibilities where features and interactions might not be used as intended
and become obsolete, we had to find various methods to experiment, validate, and iterate
our ideas quickly.
Aside from sketching and storyboarding with our stakeholders to brainstorm and validate ideas,
below were some of the prototyping techniques that were used throughout the entire project:
Low-Fidelity Prototypes
- Paper prototype: to study user’s general behaviour and mental model
- Wizard of oz: to validate user flows
High-Fidelity Prototypes
- Application prototypes on key tasks: to conduct more in-depth usability tests
The initial discovery exercises where we mapped the entire workflow for architects and interior designers helped us focus on the key tasks and determine what and how to prototype.
The illustration above is one of the storyboards I created to brainstorm and validate ideas with our stakeholders
Limitations and Constrains
One of our top priorities is to lower the learning curve while increasing productivity
with usability.
Since most of the 3d programs out there are not designed for a specific industry or specific
professionals, there are often numerous ways to create an object or achieve a certain goal.
This ultimately made the software a lot harder than it should be for most professionals and
lowers productivity.
Our direction was to minimize the number of ways of performing tasks such as drawing a floor plan
or building walls in 3D. This ultimately helps our users when going through our tutorials by
going through a more linear approach, which also helps us simplify the UI because most of the
interactions are very specific.
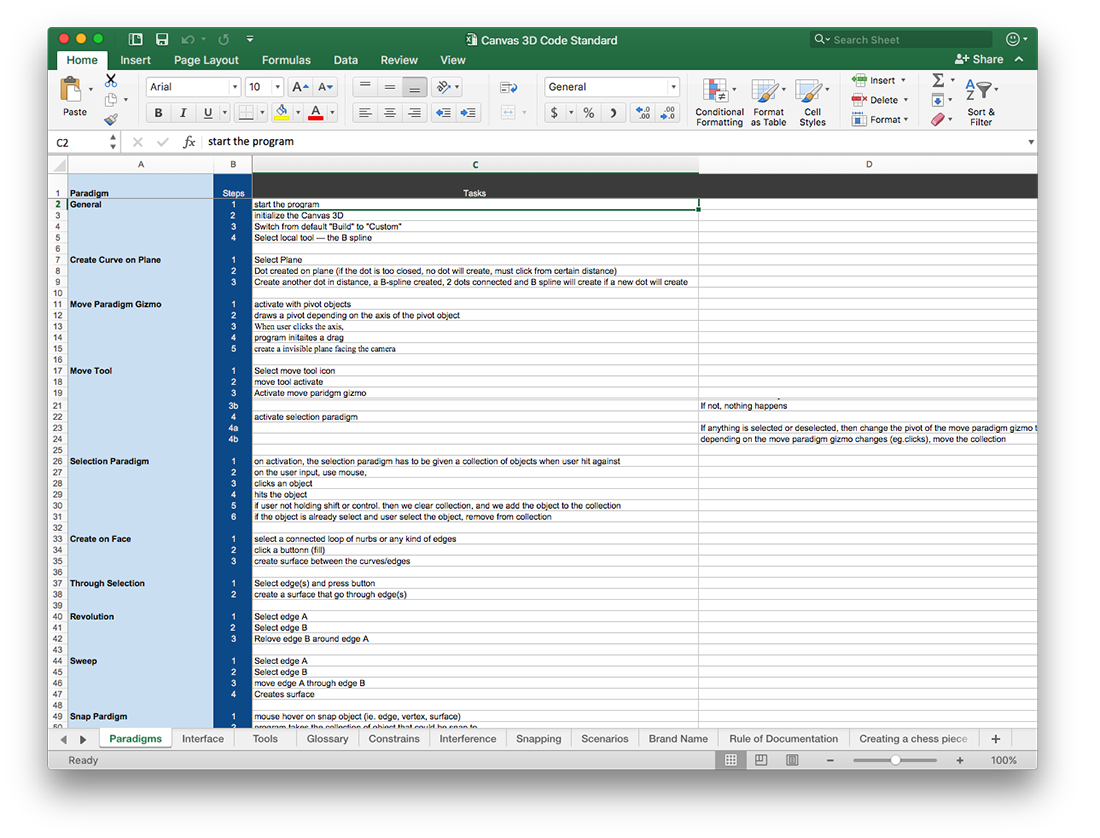
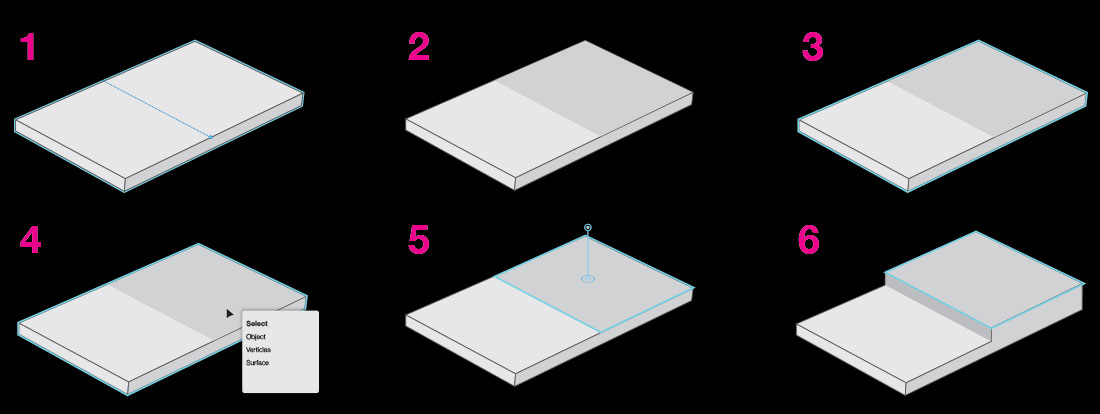
The table is a document that illustrates all steps required for each task
In addition, we also set interaction constraints for all of the features so that users can only create and manipulate objects that are physically possible in real life, For example:
- Doors can only be placed through a wall
- Objects cannot be placed in middle air
- Furnitures such as sofa cannot be moved up or down
- Decorations such as a picture frame can only be moved within the surface area of the wall
- Objects cannot be moved to go through other objects
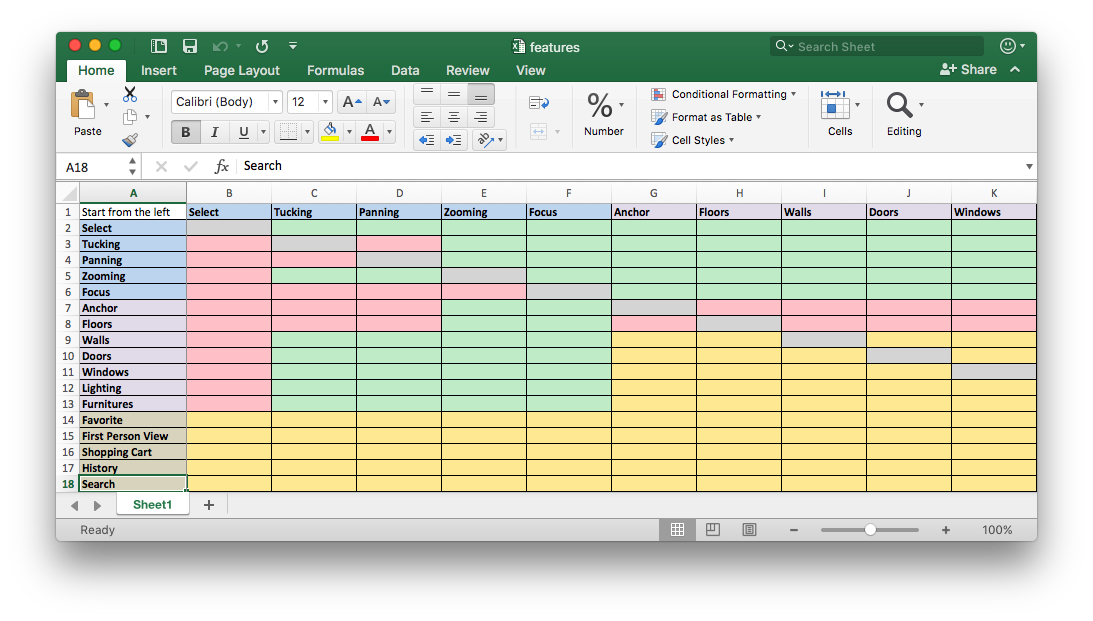
The table above shows which features can be activated when another feature is operating
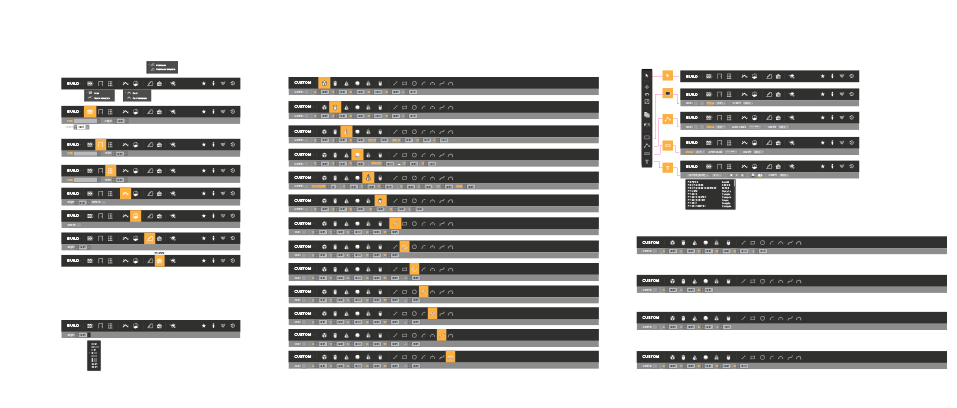
In order to streamline the process for the development team, we had also developed paradigms, which were interaction patterns that can be reuse in other features.
Navigation + Information Architecture
One of the main reasons why we did not start with designing the navigation and information architecture for the entire application is because we had to validate a lot of the flows and studied stakeholders’ mental models before we can design a more intuitive navigation and IA. With the the key interactions and user tested and validated, this gave us a better sense and feel of the entirely application and made it easier for the team to design the navigation and IA. This also allow us to prototype and test use cases which might required combinations of multiple features or flows.
Below are the 3 modes of navigation based on our 3 key user types:
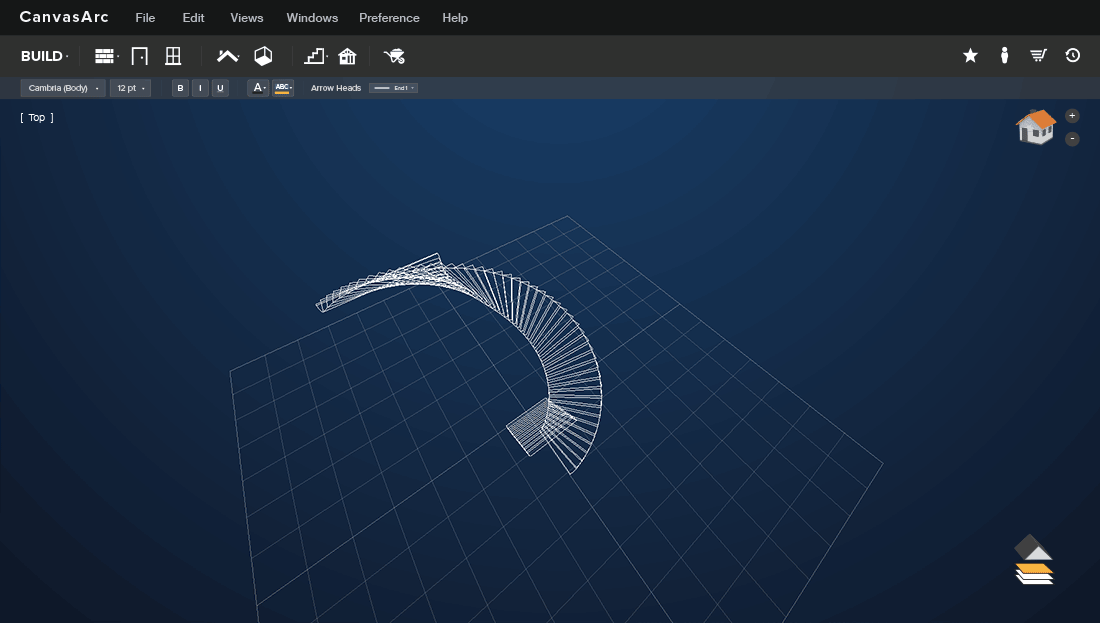
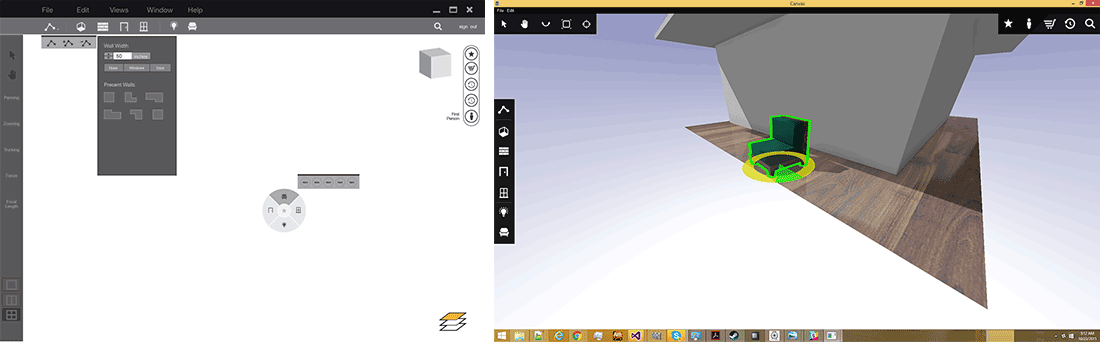
Mode 1 - Build:
Mainly used for architects to use CAD and 3D model the structural components of the building.
Examples of objects and tools users can build in this mode:
- walls, windows, and doors
- structural columns
- stairs, roof, and pipes
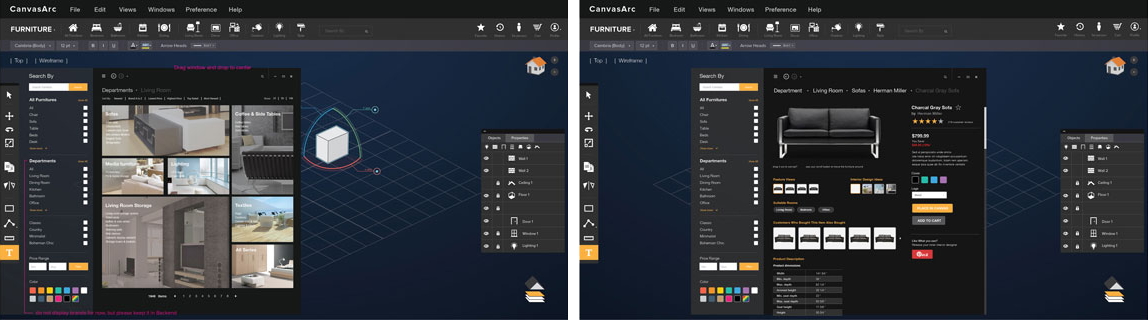
Mode 2 - Furniture:
For interior designers and furnishing companies to furnish and design the interior space.
Examples of objects and tools users can use in this mode:
- furnitures and moulding
- wallpapers and paints
- carpet and floor tiles
- shopping UI - integrated with e-commerce
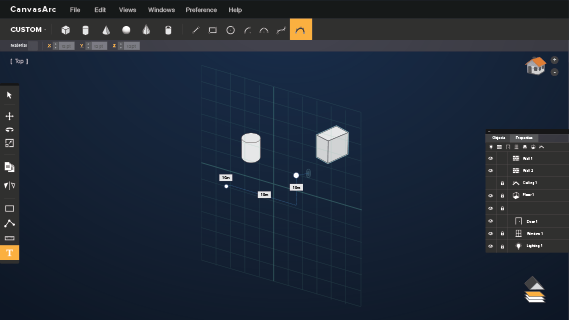
Mode 3 - Custom:
For more advanced users that want to create custom 3D shapes and objects.
Examples of tools in this mode:
- 2pt and 3pt arc
- pen tool
- extrude and bevel
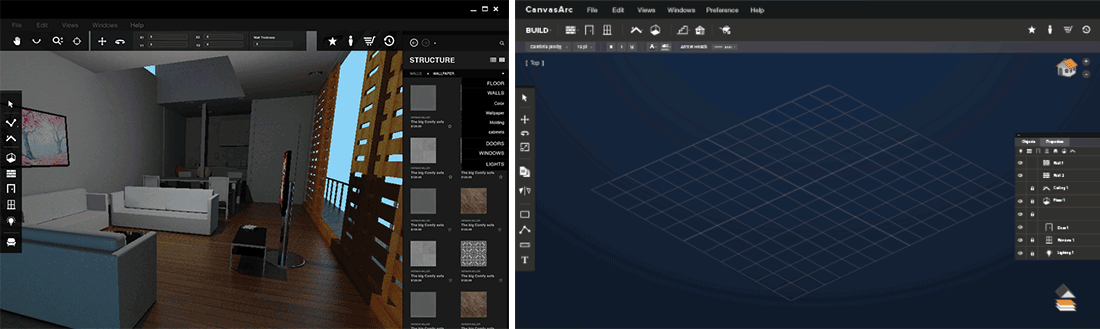
Wireframes
Early Iterations
Last Iterations
Interaction design
One of the most challenging phase throughout the entire project is the interaction design because
it is very challenging to communicate interaction ideas and the relationship between different objects
in 3D space.
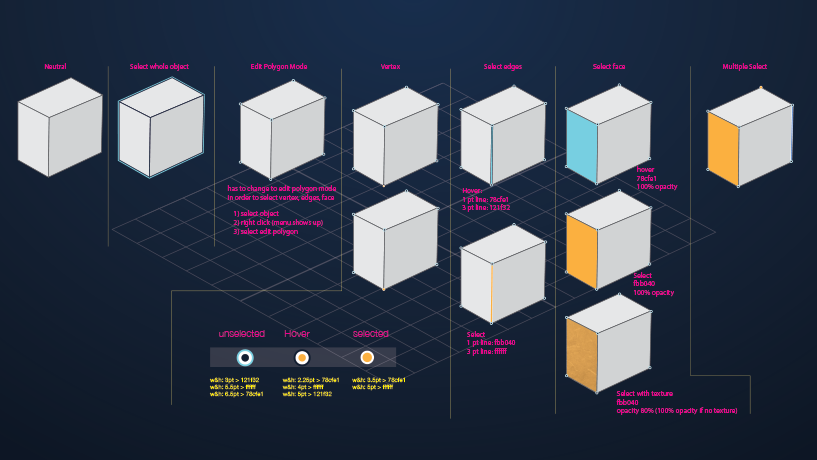
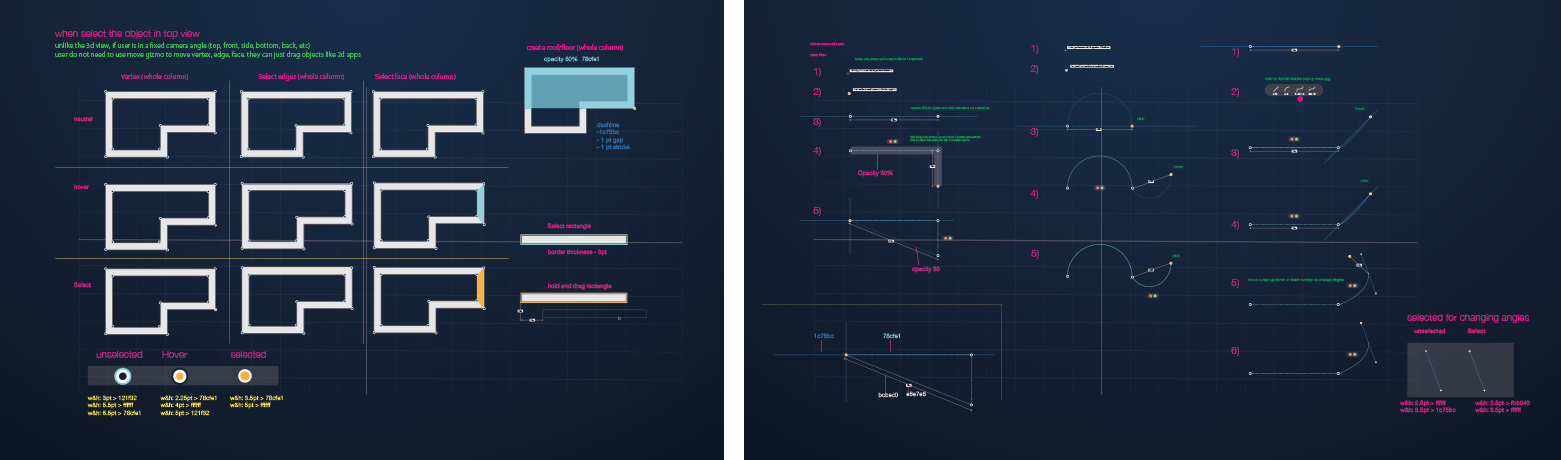
In order to show the team all interactions clearly, I created illustrations and storyboards for all the features from the beginning to the end.

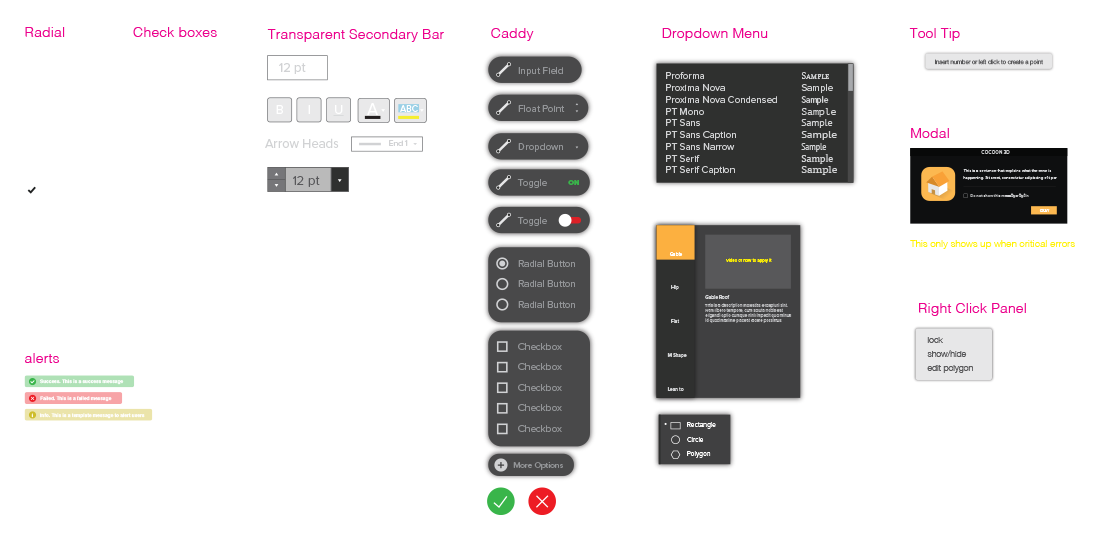
icons
UI Kit
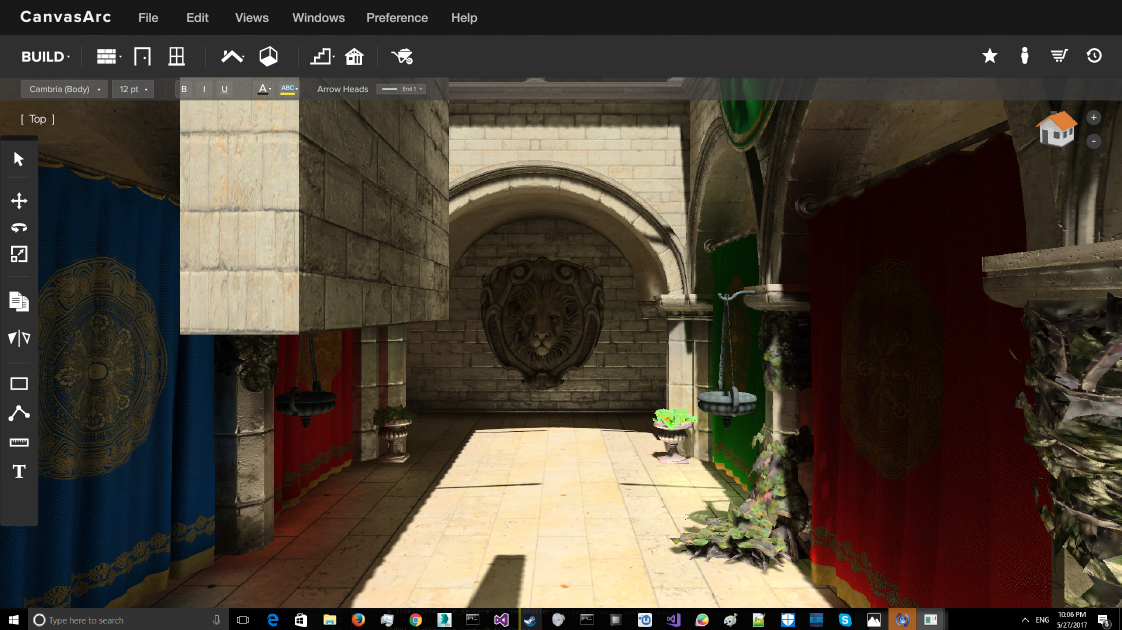
Final Product
Want to learn more?
Please feel free to contact me for further info